Showing posts with label Recipe. Show all posts

Saturday, December 1, 2012

Primal Prawn Patties with Asian Slaw

I made these babies for dinner last night, and Jake and I were both really impressed with them.
I adapted the recipe from The Primal Blueprint Cookbook.

 Primal Prawn Patties with Asian Slaw


Ingredients

Prawn Patties:
1/2kg of Green Prawns (Tails removed)
1 handful of Coriander (Roughly chopped)
1 Shallot or 1/2 a Red Onion
1-2 Cloves of Garlic (finely chopped)
1 Egg White
A good pinch of salt

Asian Slaw: (Be sure to make the Slaw before cooking your Patties)
1/4 Cabbage (Very finely sliced - You can use white, red or wombok)
1 Baby Cos Lettuce (Very finely sliced)
1/2 Red Onion (Finely sliced)
1/2 Cucumber (Sliced into half moons)
2 Carrots (Cut into Matchsticks)
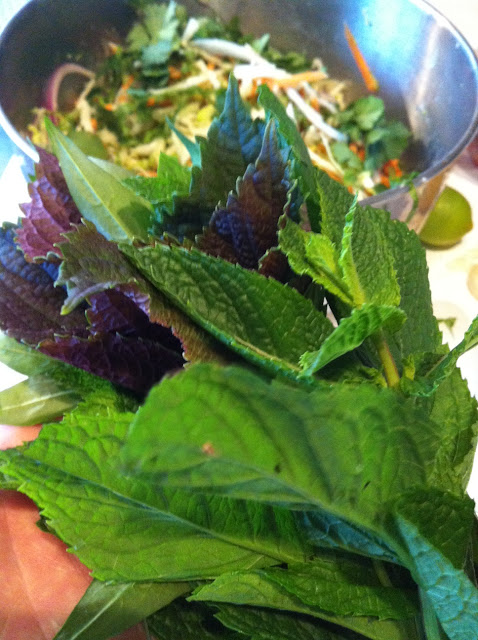
Herbs - I used Coriander, Vietnamese Mint, Mint, and Perilla

Dressing:
Primal Approved Mayonnaise:
1 Egg
1 tsp Dijon Mustard
1Tbs Apple Cider Vinegar (Unfiltered)
Cold Pressed Light Extra Virgin Olive Oil

Juice of 1 Lemon
Juice of 1 Lime
Dash of Fish sauce (optional)

Dressing Method:
- Place egg, mustard and vinegar in food processor and blend for 30 secs, with the motor still running slowly drizzle in olive oil, when you have your desired thickness stop adding oil (Make it a little thicker, because your lemon and lime juice will thin it down more)
- Add lemon jucie, lime juice and fish sauce, blend once again to combine.

Patties Method:
- In a food processor but 3/4 of your Prawns, Red Onion (or Shallot), Garlic, Coriander, and Egg white, and Salt.
(If you don't have a food processor, just chop all ingredients as small as you can, and Mix)

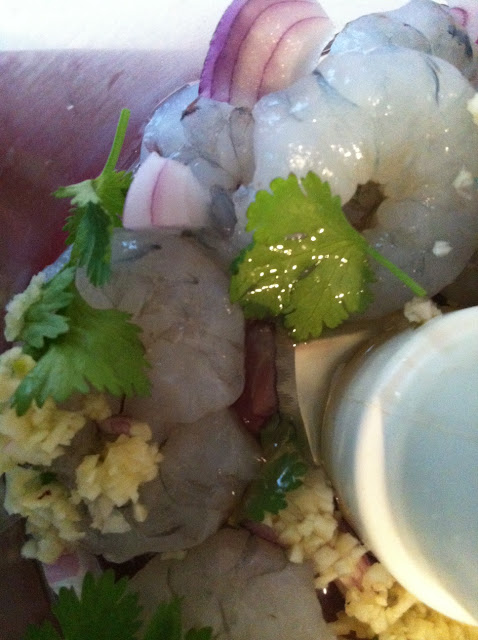

- Now Pulse or Blend your mixture, depending how fine you want your mix.


- With the remaining Prawns I chopped by hand so I have different texture of Prawns in my patties. You don't have to do this, you can blend all of your prawns if you want a smoother texture patty.

- Then stir chopped Prawns through your mixture


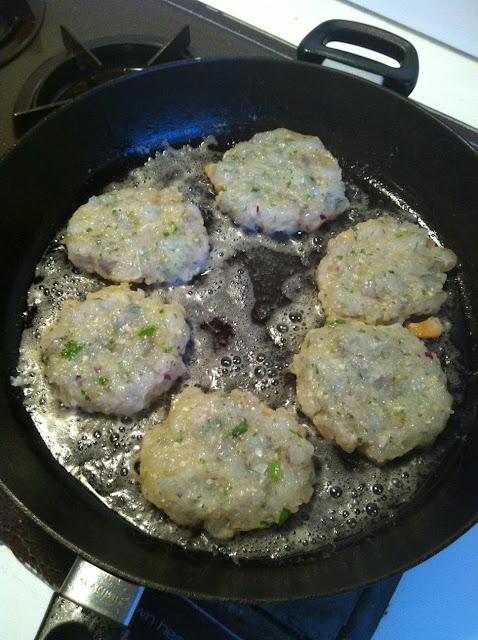
- Wet your hands (this will stop the mixture from sticking) and make Patties. I went for larger patties, but you could also make smaller ones for an entree or appetiser.


- Heat a non-stick pan on high (Non-stick is pretty important, for these delicate patties). Now being Primal, we aren't meant to use Canola or vegetable oils. So I used Coconut oil and and dash of olive oil in my pan. The Patties should only take a couple of minutes each side depending on thickness.

- Place all your salad ingredients into a bowl


- Don't forget your beautiful herbs, add enough dressing just to coat your salad (not drown it). If you have left over dressing, using it as a dipping sauce for your Patties, that's what I did. Yummo!!

- Arrange on the plate, and gobble up while still warm :)


Thursday, November 29, 2012

Primal Pulled Pork Salad

Just made this for lunch, showed it off on Instagram and now I've got recipe requests.

First and foremost I must give credit where it is due, I grabbed the Pulled Pork recipe and the BBQ Sauce recipe from the Primal Blueprint Cookbook, by Mark Sisson and Jennifer Meier. You can find a copy here.

Pulled Pork Recipe:
1 Tbs of Olive Oil
1.5-2kg Pork Shoulder (Bone in or out)
1 small onion
1/2 cup Tomato Sauce (I used the homemade Paleo Ketchup)
1 cup of Water
1/3 cup of Vinegar
1 tsp salt
1 tsp Celery seed (I used Celery Salt)
1/2 Tsp Nutmeg
1 Bay Leaf

- Honestly I think you could play around with the spices, to your taste

1) Brown meat on all sides in olive oil over Medium-Med High heat.

2) While meat is browning,combine remaining ingredients and stir to mix well.

3) Remove from heat and put everything into a dutch oven or casserole dish that has a lid


4) Cover with lid and bake at 160c for at least 2.5 hours, 3 if your shoulder has a bone.

5) Check halfway through to make sure there is plenty of liquid. I turned my shoulder over with an hour to go.

6) Remove from oven, grab to forks and start shredding the meat off, if this is not happening easily then put it back in the oven for at least another 30 mins.


Shred all the meat and put it in a bowl


Now for the Slaw (Salad)

I used:
1/4 of a Cabbage (Sliced very thinly - You could use Red cabbage which would look really pretty)
1/2 Red onion ( Sliced thinly)
1/2 Cucumber ( Half moons)
1 Tomato (Cut into thin wedges)
1 Avocado (Peeled and sliced thinly)
1 handful of Coriander
Dressing:
Primal approved Mayonnaise
Juice from 1 Lemon
Juice from 1 Lime
- Mix together


1) Toss salad with just enough dressing to coat, not to drown the slaw


2) Place Salad on plate, top with shredded Pork, then top with a lovely BBQ Sauce, Preferably Primal friendly. You can find the recipe HERE


Friday, September 16, 2011

It's Parmarama night!!!

After a few requests for the recipe I thought it was time I shared with you my recipe for the good old Aussie Chicken Parmigiana.
While still in London, Jake and I wanted to thank our friends Stina and Tony for letting us crash at their place. So we decided to make them a good Aussie dinner to remind them of home.

Below is my step by step process to help you have a great 'Parmarama Night'

Shopping List


4 Chicken Breasts ( or 1 per person )
300gm Plain Flour
4 Eggs
1/4 cup Milk
500gm of Bread Crumbs (fine, course or panko)
Handful of your favorite herbs (fresh or dried) chopped
100gm dry Parmesan cheese (optional)
Canola or Vegetable oil
1 Bottle/ Jar Tomato Passata or your favorite pasta sauce
300gm Grated Tasty Cheese
300gn Grated Mozzarella Cheese
-----------------------------------------
Potatoes
Salad stuff


Here goes.........


1) Buy 1 chicken breast for every person you will be feeding
2) Place the chicken breast upside down on the chopping board
3) Place your non knife hand on top of the chicken breast to hold it firmly down on the board, bring the knife to the fattest side of the chicken breast
4) Gently cut through the middle of the chicken breast roughly 1cm til the other side ( Your knife should not come out the other side)


5) Now open up your Chicken breast from the cut and use your palm to flatten it
6) Place chicken breasts on some plastic cling film, then place another layer of cling film on top of the chicken breasts
7) Use a meat mallet, or pot ( or you could use a wine bottle) to bang down the chicken breasts to evenly flatten them out
8) Your breasts should be nice and flat like pic #8 now their ready for crumbing


YOUR CRUMBING STATION

You will need one tray of Flour, season this with salt and pepper. One bowl of egg wash, whisk up 2-3 eggs you can add a little milk to extend the mixture. One tray of bread crumbs, the store bought ones are fine, we used them here. Normally I would make my own bread crumbs using some stale bread. Panko bread crumbs are excellent to use. You can also flavour your crumbs with any herbs you like really. We used dried Rosemary, but I really like to use fresh chopped Thyme, use can also add grated parmesan cheese.


9) Place 1st chicken breast in the flour coating both sides, be sure to shake off the excess.
10) A handy tip for not getting sticky hands is to use one hand to handle the chicken in the dry ingredients and use your other hand for the egg wash part.
11) Next place that chicken breast in the egg wash and coat both sides, lift chicken breast and allow the extra egg to drip off
12) Lastly put the egg coated chicken into the bread crumbs


13) Be sure to fully coat the chicken, you can help by pressing the crumbs into the breast to make sure they stick
14) Once you have finished with the first chicken breast, place it onto a plate and repeat the process with the remaining breasts. You now have Schnitzels...the first step to your Parmas.

NOW FOR THE COOKING

1-2) Heat up some canola or vegetable oil in a pan (these 2 oils have a higher smoking point and so are ideal for shallow frying) Drop a crumb into the oil, if it bubbles and brown the oil is ready.
Gently place the Schnitzel into the oil, lowering it so it falls away from you so the hot oil doesn't splash back at you.
Fry for at least 3-4 mins, check how your schnitzel is going by lifting up an edge. Your looking for a lovely golden colour
3) Once you have the desired colour flip your Schnitzel over and cook other side to same desired colour
4) Take out your Schnitzels and place them in an oven proof tray.


5-6) Top Schnitzels with your favorite pasta sauce, plain tomato passata can also be used but wont give off  as much flavour, a home made Napoli sauce is ideal
7) Now top your Schnitzels with shredded cheese. I use 50% shredded tasty cheese and 50% shredded mozzarella cheese which I mix up in a bowl before topping. I think this is were a lot of people get this wrong. They either use all tasty cheese but then get not stretch in your cheese, or they use all mozzarella for stringy stretchy cheese but get not bite from the tasty cheese.
8) Be sure to top the cheese higher in the centre of the Schnitzel for when the cheese begins to melt as we cook them it will stay on the parma and not end up all over your oven tray.
Now place your Parmas in the oven for roughly 10 mins on 180-200 degrees,once the cheese is looking nicely melting place the tray under your grill to brown and crispen up the cheese, this step should only 1-2 mins


So here's how your Parmas should look when you bring them out from under the griller, and here are some yummy home made potato wedgies we made too.

And now time to eat...Buon Appetit


Friday, January 7, 2011

Don't be so Bitter

I don't know how many times I've been to the markets and walked past this little critter, always intrigued, always fascinated. I don't know why this trip to the Footscray market was any different? Yes I do...I've started a Blog and now I'm giving myself a bit more of a kick up the arse to try new things (even more so when I was in my cheffing days). So without further ado...may I present....

The Bitter Melon
(Momordica charantia, called bitter melon or bitter gourd)

Now I know you're sitting there going...well Der! But I was quite excited, this is one cool looking fruit.
So now all I had to do was find a recipe,  a quick Google and Voila!!!

STUFFED BITTER MELON


1) Soak Shitake mushrooms in boiling water until hydrated (roughly 25mins)
2) Slice your bitter melon into 1 inch thick slices
3) Either scoop out the seeds with a spoon or very carefully use a small paring knife to cut out.
4) Blanch the bitter melon in boiling water for 2 minutes and then refresh in a bowl of ice cold water ( I would salt my boiling water, i'll explain why later)


Make up you stuffing, I used Pork mince and green prawns, add your chopped mushrooms, light soy, pepper, rice wine and cornflour. Mix well, then fill your melons (be sure to overfill the melons as the stuffing will shrink during the cooking process)


Place stuffed melons in a steamer and steam away for 15 - 20 mins. Start your sauce in either a wok or large flat pan, place the stuffed melons in the sauce and simmer for an extra couple of minutes


Serve with rice and topped with spring onions. For full Recipe please see below.

Now for the funny part of this post.....
 I cooked this dish with absolute confidence that is was gonna be an absolute cracker, great ingredients and it smelled great!  The only problem is...I now realise I really really dont like Bitter Melon...yuk!  When someone many moons ago gave this pimply green vegetable a name...They weren't kidding!!

And now you're wondering why the hell did I even bother posting this and for my first recipe post...? Well..the truth is this blog is a cooking journey and I must post the bad as well as the good.

On the bright side though (Yes I do believe there is one)  My very clever partner Jake suggested  that instead of using Bitter Melon, we use ZUCCHINI!!!! Brilliant! My boy is a genius! Why didn't I think of that?

So if you do enjoy Bitter Melon by all means go ahead it is a great tasting dish, If It's not really your thing, and I do sympathise, give Zucchini or even Cucumber a go. I know I will, and make sure i'll let you know how I go.

Stuffed Bitter Melon


For Stuffing
  • Large pinch of white pepper
  • 3 shiitake mushrooms, re-hydrated and chopped finely
  • 1 tsp cornflour
  • 4 tsp light soy sauce
  • 1 bitter melon ( or Zucchini or Cucumber )
  • 450 grams minced pork, or half pork half raw prawn
  • 1 tbsp Shaoxing rice wine
For Sauce
  • 2 tbsp sugar
  • 2 spring onions, sliced on the diagonal
  • 3 cloves of garlic, minced
  • 2 tbsp cornflour, slaked
  • 250 ml chicken stock
  • 2½ tbsp fermented black beans, chopped and mashed
  • 1 inch of ginger, chopped finely
Process

Add prawns or pork, Shaoxing wine, shiitake mushrooms, cornflour, white pepper and soy sauce to a bowl and mix well. Now slice the melon into 1 inch slices, remove the seeded spongy part. Once you are done with this, blanch the melon slices in salted water and refresh. When done, stuff the slices with pork mixture, stuff as much as possible as the stuffing will shrink. Steam the stuffed melons for about 15-20 minutes, in two batches. Now keep that aside and heat up a wok. When it is properly heated, add vegetable oil to it, swirl it around. Now add garlic and ginger, mix until light browned and then add stock, black beans and sugar. Mix well and add the melon rings and simmer for about 2 minutes. After 2 minutes, take out Melons and place on your serving plate. Now to your sauce add slaked cornflour and simmer further, until thickened. Season with spring onions and serve with rice